11 Tips To Make Trimming Your Dog's Nails Easier
We may receive a commission on purchases made from links.
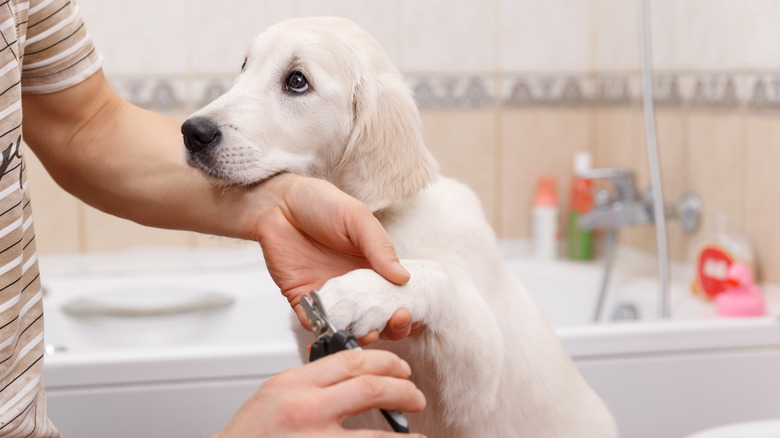
Of all the chores you gladly take on for the sake of your dog's health and happiness, trimming their nails might be among your least favorite. Very rarely do pups immediately tolerate having their nails clipped without putting up a fight; those who don't actively try to wriggle away may lash out in fear. As the human wielding the clippers, the pressure to cut your canine's nails short enough for their comfort but not so short you inadvertently injure them is immense.
Yet routine nail trims are imperative for every dog's ongoing health. Nails that are left to grow too long will eventually curl back on themselves, causing a considerable amount of pain and ultimately leading to long-lasting health issues like infections and arthritis. And the more trimming sessions are skipped or delayed, the harder it is to restore a pup's nails to a healthy state.
Trimming your dog's nails without a fuss might seem like an unattainable dream, but it doesn't have to be. There's a host of wisdom to be gleaned from professionals who clip dozens of nails every day to innovative DIY groomers alike. With these game-changing tips and a bit of persistence, home nail trimming sessions can become easier than you ever thought possible.
1. Train your dog to tolerate nail trimming
Most canine behavior experts advise that the best path towards long-term success in trimming your dog's nails stems from training. With the right training, many pups can learn not only to feel comfortable having their nails trimmed but even look forward to getting the rewards they associate with the procedure. This process takes time and requires a combination of gradual desensitization and positive reinforcement training.
Training your dog to tolerate nail trimming is most effective when started as early as possible in their life, preferably when they're still a puppy. Set aside a few minutes during your daily training session to get your pup used to having their paws handled. Begin with light touches for just a second or two before extending the amount of time and intensity, incorporating generous rewards and praise with each repetition. Next, introduce the nail clippers by leaving them out where your dog can sniff and explore them at their own pace. Once the clippers are a familiar object, slowly start to handle them in front of your pup, touching their paws lightly with the tool and rewarding them with treats. It may take several days or weeks of incremental exposure before your dog feels comfortable enough to graduate to actual clipping.
Dogs who have already developed a fear of nail trimming can be trained to accept it, too. However, they're likely to need a bit more time and patience. In these cases, positive reinforcement truly is the key to reframing your dog's mindset and teaching them there's nothing to be afraid of.
2. Find the right position
Trying to trim a dog's nails in the wrong position is an easy way to make the process more frustrating and less comfortable for both you and your pup. It could even set you up for an injury-inducing mishap. While there's no single right way to position yourself, veterinarians and groomers have a few different preferred methods you can try until you find the one that feels right.
Depending on the pup, you may find it easiest to have them stand while you sit or kneel on the floor and clip their nails. This method tends to be the least cumbersome for larger breeds. Remember that dogs' joints are designed to rotate their paws down and back towards their tail, not up and forward towards their nose. With this in mind, try to position yourself at your canine's side or behind them where you can comfortably flip their paw under for a clear view of their pads and nails.
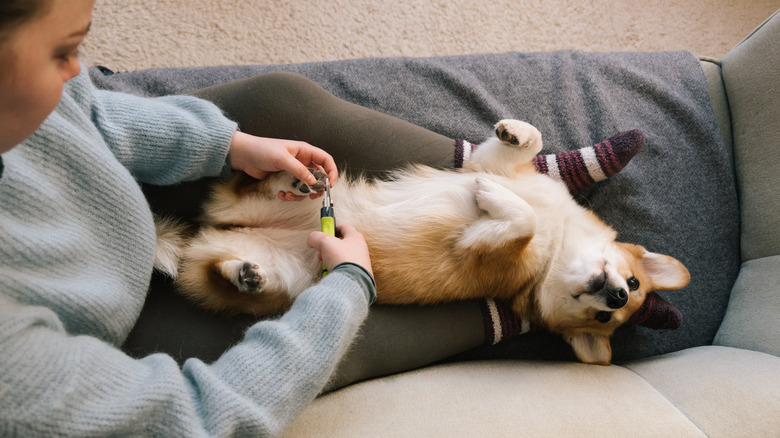
Some dogs, particularly those who are smaller or older, are resistant to having their paws handled while standing. It can affect their balance and make them wobble, feel anxious, or even topple over mid-snip. In this case, try having them sit or lie in your lap or on their bed while you work on their nails. This position makes it easy to maneuver your pup onto their back, belly, or side to find the right angle for trimming; just be mindful of doing so without causing them discomfort.
3. Trim slowly
Arguably the most intimidating aspect of trimming your dog's nails at home is the potential of cutting too far and hitting their quick. The quick is the fleshy interior of your dog's nail that is composed of a high concentration of blood vessels and nerves. Even snipping a hair too far could mean accidentally nicking the quick, leading to a bloody mess and putting your dog in considerable pain.
While the outline of the quick is typically visible on dogs with pink nails, it's nearly impossible to spot on black nails. To minimize the risk of inadvertently injuring your pup, trim each nail as slowly as possible, taking off just one millimeter at a time until their nails are an appropriate length. You can tell it's time to stop cutting when a light-colored circle surfaces on the tip of the nail.
Another tried and true nail trimming hack developed by groomers is shining a bright light from the opposite side of the nail and looking for the quick's outline. Your smartphone's built-in flashlight is perfect for this task. There are also dog nail clippers with built-in guide lights available, such as the iToleeve LED Dog Nail Clipper with Light and the PAKEWAY Pet Nail Clipper with LED & UV Light.
4. Know what to do if you catch your dog's quick
Even the most experienced groomers aren't completely immune to accidentally cutting the quick while trimming a dog's nails. In the vast majority of cases, this is an extremely minor injury that resolves on its own without the need for further medical care. However, you should still familiarize yourself with a few canine first aid practices and assemble some supplies to keep within reach just in case there's a small casualty.
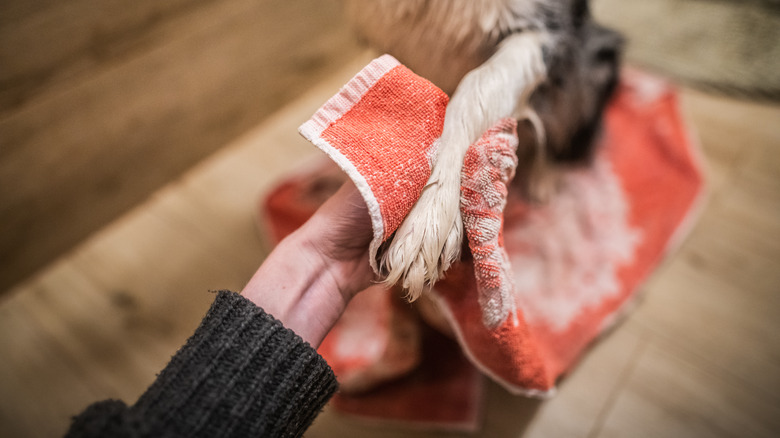
In the event that you see blood during a nail trimming session, stop cutting immediately and use a clean, dry cloth to apply pressure to the area. You can also use a canine-friendly styptic powder, like the Miracle Care Kwik Stop Styptic Powder for Dogs, Cats, and Birds or the Chew + Heal Labs Styptic Powder for Dogs, Cats, and Other Animals, to clot the wound quickly. If you haven't already added a styptic powder to your pup's first aid kit, baking soda or cornstarch will also work in a pinch; just be aware that too much baking soda is bad for dogs as it's considered toxic in large quantities.
If a nicked quick hasn't stopped bleeding after an hour with home intervention, it might be time for a call to the emergency veterinarian. You should always seek care immediately for any type of bleeding if your pup has a history of high blood pressure or clotting disorders. No matter what happens, try to stay as calm as possible. Your dog can easily pick up on your mood, so showing them you're stressed might make them aversive to future nail trimming sessions.
5. Give them a reward after every nail
Not only is positive reinforcement pivotal in training dogs to tolerate nail trimming, it's also crucial to continue providing rewards even after the initial training phase is complete. Nail trimming is a naturally uncomfortable experience for most pups, so you should be sure to consistently acknowledge their patience and good behavior. Taking away the reward your dog has grown to associate with trimming sessions could make them less cooperative and require further training to reverse.
But while many pet owners associate rewards with a tasty snack, this isn't necessarily the case. In fact, experts warn against solely using treats as positive reinforcement. Your dog's instinctive desire to please you means praise might very well be enough of a reward on its own. According to the American Kennel Club, treats should always be kept to no more than 10% of your pup's daily diet; giving them one after trimming every single nail is a fast way to exceed the healthy limit.
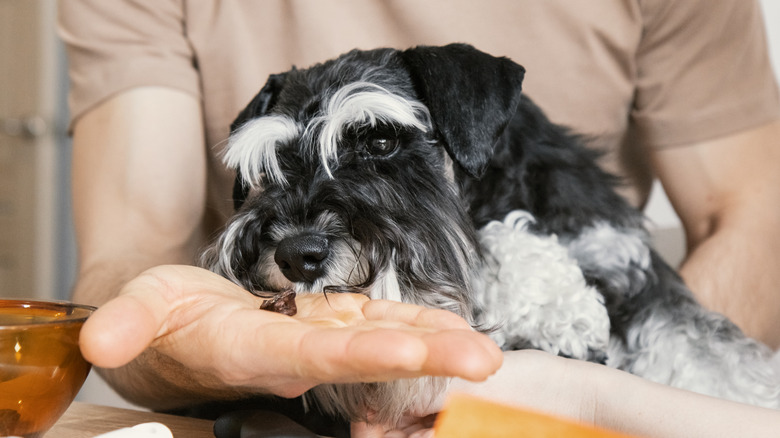
Keep nail trimming exciting without over-treating your dog by varying the rewards you offer throughout each session. After you finish trimming each nail, pause for a few moments to reward them in the form of praise. They'll appreciate the short break and the reassurance that they're making you happy. Incorporate food-based rewards by offering a small treat after completing each paw or their favorite chew stick after the session is complete.
6. Invest in a good pair of clippers
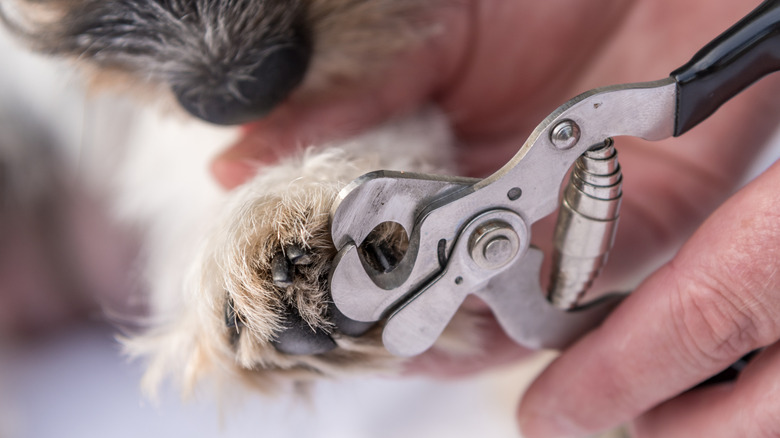
With so many hidden costs of pet ownership, the desire to save a few dollars wherever you can is more than understandable. However, your dog's nail clippers are one item you shouldn't be too frugal about. Clippers that aren't sturdy or sharp enough can make trimming your pup's nails even more challenging. Blades that are too dull tend to crush the nail instead of cutting it, causing your canine pain and leaving a jagged edge that could split your dog's nail vertically and eventually lead to an infection.
Take time to compare reviews and ask your veterinarian for recommendations before taking the plunge on a new pair of nail clippers for your dog. Even if you have to spend a bit more up front, investing in a sturdy pair with replaceable blades – like the Resco USA-Made Nail Grooming Kit or the Hertzko Dog Nail Clipper with LED Light & Replacement Blade – can actually end up saving more in the long run. Instead of having to keep buying replacement clippers whenever a pair goes dull, you can simply order a new set of blades for a fraction of the price.
7. Try a nail file or grinder
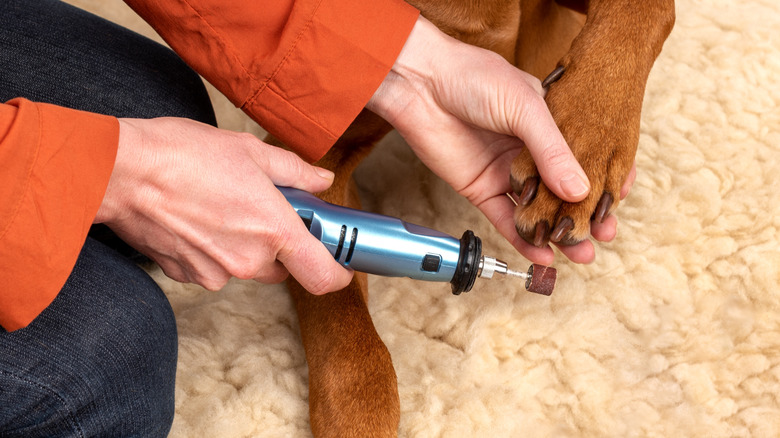
Whether due to past negative experiences or a natural aversion, some dogs simply hate nail clippers regardless of the amount of positive reinforcement they receive. Nail grinders and files are great alternative tools for dogs who struggle to tolerate traditional clippers. Instead of clipping off large sections at a time, these tools gradually wear down the tip of the nail, giving a smooth, polished result.
Dog nail grinders, like the Casfuy 6-Speed Dog Nail Grinder and the Dremel PawControl 7760, are electric tools that work by spinning a coarse wheel-shaped head that can be applied to the tip of your pup's nail to grind it down like sandpaper. They're typically rechargeable and most have replaceable heads. While some dogs prefer grinders over standard clippers, others find the loud noise and sensation even more difficult to endure. You should also carefully monitor the tool's temperature when using a nail grinder on your canine as the friction can cause overheating.
Dog nail files – such as the Coastal Pet Safari Dog Diamond Nail File and the Upgraded Dog Nail Scratch Board – are much easier for noise-sensitive pups to tolerate. Like nail grinders, files shorten the nail by gradually wearing down its end. However, they require manual action and may necessitate more frequent grooming sessions that last significantly longer.
8. Put peanut butter on your forehead
The internet's favorite viral dog nail trimming hack is one you won't want to skip over if your pup is a peanut butter lover. Slip a waterproof shower cap over your hair or wrap the crown of your head in kitchen wrap and smear a generous spoonful of dog-friendly peanut butter across the plastic. Your pet will be so busy licking up every last taste of the sticky treat they may not even see the nail clippers come out. It might feel silly, but it's virtually guaranteed to make your next trimming session a breeze.
Always be extremely cautious about reading the ingredients list before you crack open a jar of peanut butter for your pup. Xylitol, a sweetener used in some peanut spread brands, ranks extremely high on the list of things your dog cannot eat due to potentially fatal complications like hypoglycemia and liver failure. Peanut butter also has lots of calories and may not be the smartest choice for pups on a diet. Alternatives like Greek yogurt, plain unsweetened applesauce, and packaged wet food are also perfectly adequate.
9. Try to stay calm
Science has repeatedly shown that dogs are natural-born empaths who not only can sense when their favorite human is stressed but are likely to reflect their stress as well. In a 2022 study published in PLoS One, for example, canines were able to identify which humans were experiencing stress just by sniffing sweat and breath samples with over 90% accuracy. Their ability to detect these miniscule physiological changes is just one of many ways dogs have evolved as our emotional companions over tens of thousands of years.
It goes without saying, then, that your pup can easily pick up on your body language, voice tone, and even tiny shifts in the chemical makeup of your sweat when facing an anxiety-inducing situation like trimming their nails. While it may be easier said than done, try not to let your frustration or stress show during a grooming session. Letting your emotions get the best of you is likely to exacerbate any existing anxieties your pup might have and make the situation more challenging for both of you.
Go into each nail trimming session with as much confidence as possible by watching videos online and familiarizing yourself with the tools far in advance. Consider asking your dog's groomer or veterinarian to walk you through trimming techniques and supervise a practice session. Most importantly, if you feel anxiety or frustration creeping in, don't be afraid to take a break and decompress. If you stay calm, your pup will understand they can remain calm, too.
10. Introduce a muzzle if your dog has a history of biting
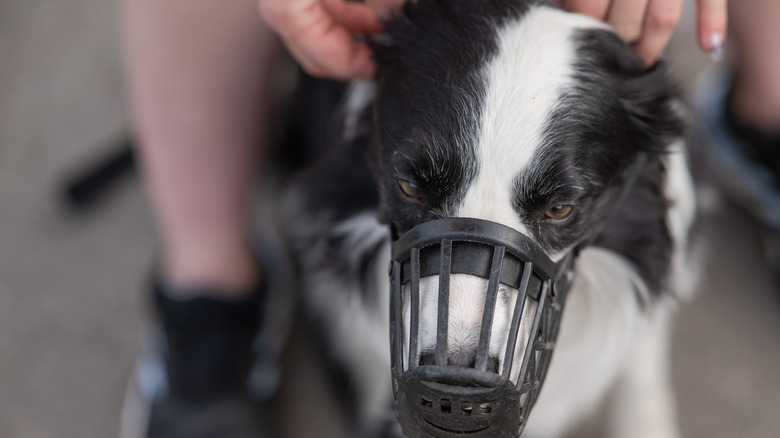
Regular nail trimming is essential and non-negotiable for your dog's health, but it's just as important to keep yourself safe during the process. While life would be much easier if you could simply talk to your pup and reassure them that they have nothing to be afraid of, some canines may legitimately view nail trimming as a serious potential threat to their safety. It's not uncommon for dogs with past trauma or an unknown history to react out of fear and attempt to defend themselves by biting. A muzzle may be necessary precaution if they have a history of biting or attempting to bite others. If you decide muzzling is the best course of action for introducing nail trimming, make sure to carefully select the right type of muzzle and get your dog acclimated to wearing it in a low-stress environment first.
"Putting the muzzle on and taking it off immediately several times throughout the day for one week or so is a great way to start," Dr. Leni Kaplan '91, senior lecturer of clinical sciences at Cornell's Small Animal Community Practice, explained. "Immediately after the muzzle is removed, give the pet a treat and praise. Over time, clip the muzzle in place and then immediately remove. Then, start to leave the muzzle on for up to three seconds and then remove it. And so on, until the muzzle is another accessory like a harness or coat." The muzzle's strap should fit snugly around their face without slipping off while the cage should be roomy enough to allow them to pant, drink, and take treats without restricting their movement.
Even if you employ a muzzle, you should not force nail trims on a dog. This is merely a tool you can use to protect yourself until you've established trimming as a non-threatening occurrence via acclimation and positive reinforcement. If your pup continues to react to the activity with fear or aggression, speak to your veterinarian for alternatives.
11. Stay on top of regular trimming
The recommended frequency for nail trimming varies slightly by dog, but professional groomer Jennifer Nelson suggests a maintenance session about once per month (via BeChewy). If your pup goes for long daily walks in an urban environment, you may be able to get away with an extra week or two between trims as the extensive contact with concrete and asphalt surfaces works as a natural nail file. Couch potatoes, however, should have their nails checked even more frequently to make sure nothing has grown out too far.
Even though it can be a tempting chore to put off at times, letting too much time pass between nail trims can make the next session more difficult than it's worth. Over time, nails that are allowed to get too overgrown will also start to grow longer quicks, meaning you'll be unable to cut them as short as they should be without causing bleeding. While this is reversible, it takes consistent weekly trims to return the nails to a healthy maintenance state.
Trimming nails every three to six weeks is the best way to keep the process as pain-free and relaxing as possible for your pup. Alternatively, you could try cutting just one nail per day to spread out the task and make it less intimidating or to get your canine warmed up to the clippers early on. Whichever schedule works best for you, staying consistent should make nail trimming easier with each session that passes.
