The DIY Dog Nail Trimming Hack That Will Change Your Life
Caring for a dog means managing a list of responsibilities, including a few inconvenient ones, like nail trimming. Most pooches abhor the nail-trimming experience, and when you factor in how often dogs need their nails trimmed (about once or twice a month), you could end up dealing with a lot of canine tantrums. This is why many dog parents opt for nail filing instead. Although it's a safer alternative, some dogs aren't a fan of this option, either. This has led to the production of scratchboards and DIY creativity, giving dog owners the option to clip a dog's nails without clippers. For instance, one TikToker created her own filing board for about $5 to encourage her dog, Kirby, to file his nails himself.
@_kirbythedog_ This worked so much better than expected and was so simple to teach! #fyp #dachshundsoftiktok #dachshund #rescuedog #doggrooming #dognailclipping #jackrussell #jackrussellterrier #muttdogsoftiktok #diydog #dogtraining #doghacks
This DIY nail trimming hack consists of two key items: a sheet of sandpaper attached to a standard-sized clipboard. Unlike cats, dogs don't instinctually go around scratching textured surfaces to sharpen their nails. Sometimes, they scratch at an object or surface to access something behind or underneath it or to get their owners' attention. To get your dog to scratch your DIY scratchboard, place a desirable item underneath or behind it, prompting it to scratch the board to access it.
You can also use your dog's food or favorite treats near the board or in your hands. Make sure it can see and smell the food, and encourage it to scratch the board by tapping on it. After the first successful scratch, reward it with the treat. You can repeat this a few times in one day or over several days until the nails are filed down to an appropriate length.
Factors to keep in mind when making a scratch board for your dog
The DIY nail filing hack takes mere seconds to put together, but there are a couple of factors to consider for the best results — and to prevent accidental injury. The first is the grit number of the sandpaper, which you'll see on its packaging and typically ranges from 24 to over 1,000, and the second is protecting your dog's paw pads.
Sandpaper grit measures the paper's coarseness. The lower the number, the more abrasive the paper. The TikToker used 60-grit sandpaper for Kirby, which is a coarse paper commonly used for stripping old paint off of wooden surfaces. However, the grit you should choose for your board depends on your dog's size and nail thickness. For context, Kirby is a mixed-breed dog that appears to weigh under 20 pounds. A medium or fine sandpaper — 80-grit or 120-grit, respectively — should work well for DIY scratching boards.
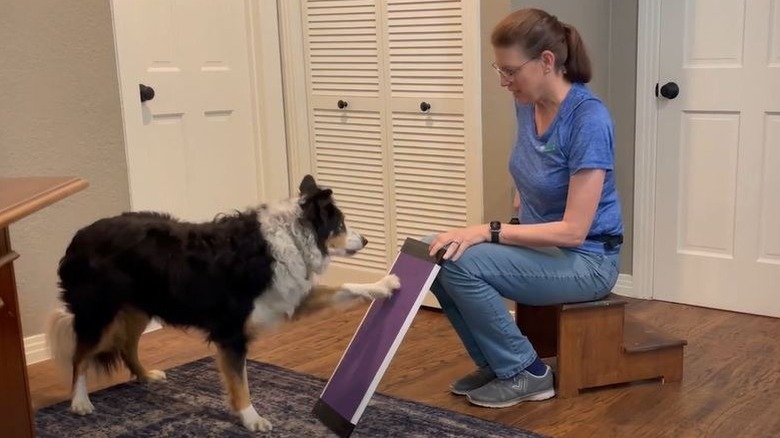
Once you've selected an appropriate sandpaper for your DIY scratch board, make sure to protect your dog's paw pads. If the board is lying flat on the ground, your dog's paw pads will rub against it. Medium-grit sandpaper, combined with excessive scratching, could result in dog paw pad injuries, leading to potentially expensive treatment. To prevent this pad-to-sandpaper friction, position the board in a 45-degree angle in relation to your floor. In addition to protecting the paw pads, this angle will result in smoother, more rounded nails, compared to a board lying flat on the board.